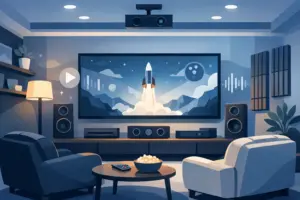
A great projector and premium speakers can still underperform if the lighting is wrong. Harsh downlights wash out the screen, bright sconces create glare, and a single wall switch leaves you choosing between too bright and too dark. The best home theater room lighting ideas solve all of that by making the room feel cinematic while protecting picture quality, comfort, and easy control.
Lighting is one of the most overlooked parts of theater design because it sits between aesthetics and performance. Homeowners often focus on the display, seating, and surround sound first, then treat lighting as a finishing touch. In practice, it should be part of the system design from the beginning. When lighting is planned with the room, the result is cleaner sightlines, better contrast, safer movement, and a more polished experience every time you press play.
Why lighting matters in a home theater
In a dedicated media room, light affects more than mood. It changes how your eyes perceive black levels, color saturation, and on-screen detail. Even a high-performance display can look flat if the room introduces stray light from recessed cans, windows, or reflective surfaces. That is especially true with projection, where ambient light has a direct impact on image quality.
There is also the practical side. People still need to enter the room, find seats, carry drinks, and use controls without stumbling around in the dark. Good theater lighting balances visibility and restraint. It gives you enough illumination for comfort, but not so much that it pulls attention away from the screen.
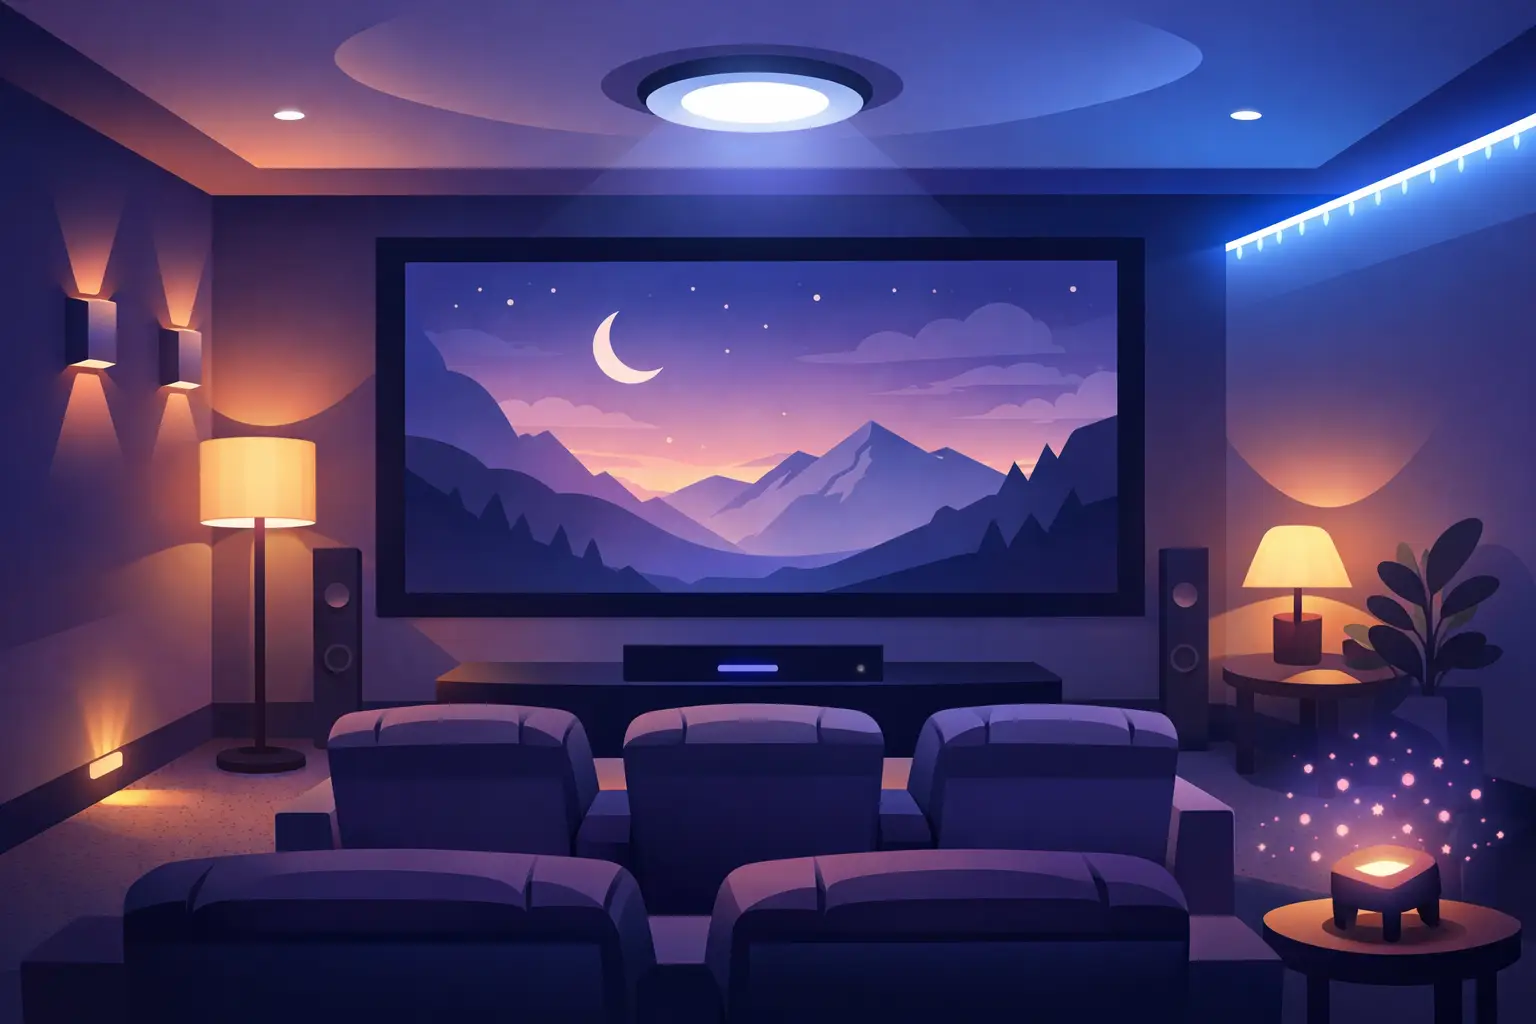
Start with layered lighting, not one fixture
The strongest home theater room lighting ideas usually begin with layering. Instead of relying on a single overhead fixture, the room should use multiple lighting types that serve different purposes. Ambient lighting sets the overall tone before the movie starts. Accent lighting highlights architectural features, columns, or wall treatments. Task lighting helps at seating areas, snack counters, or equipment zones. Low-level pathway lighting improves safety during viewing.
This approach gives you flexibility. Pre-show, intermission, casual sports viewing, and full movie mode all need different lighting levels. A layered system lets the room adapt instead of forcing one compromise setting.
1. Use dimmable recessed lighting carefully
Recessed fixtures can work well in a theater, but placement matters. When cans are positioned directly over seating or in the screen sightline, they create glare and visual distraction. They also tend to feel too clinical if used as the main light source.
A better approach is to place recessed lighting around the perimeter and put every fixture on a dimmer. That gives you general illumination when needed without flooding the room during viewing. Warm color temperatures typically feel more natural and inviting than cooler white light, which can make the room feel more like an office than a private cinema.
2. Add LED cove lighting for a premium look
Cove lighting is one of the most effective ways to elevate a theater without introducing glare. Hidden LED strips installed in tray ceilings or soffits create soft, indirect illumination that adds depth to the room. Because the light source is concealed, the effect is refined and comfortable.
This is especially useful in high-end theater spaces where clients want a clean architectural finish. Cove lighting can also define the room when the screen is off, helping the theater feel intentional rather than simply dark. The key is brightness control. It should enhance the room, not compete with the display.
3. Use wall sconces with shielded light output
Wall sconces are a classic theater detail for a reason. They bring a cinematic look and provide soft side lighting that supports movement before and after viewing. The wrong fixture, however, can throw light outward in a way that reflects off the screen or causes hot spots on glossy finishes.
Look for sconces with controlled, downward, or shielded output. In a true theater environment, less is usually more. The fixture should contribute to atmosphere without becoming a visual focal point once the content begins.
4. Install step lights for safety and polish
If your theater has risers, step lights are not optional. They improve safety and make the room easier to navigate in low-light conditions. Even in a single-level room, subtle pathway lighting near baseboards can make a big difference.
This is one of those upgrades that feels small until you use the room regularly. It prevents the awkward flashlight effect of turning on bright lights just to move through the space. Done correctly, step lighting becomes part of the theater experience rather than an obvious utility feature.
5. Control natural light with motorized shades
Some media rooms are fully dedicated and windowless. Many are not. If your space has windows, light control is just as important as fixture selection. Blackout shades or drapery dramatically improve daytime viewing and help maintain consistent image quality.
Motorized shades are the cleanest solution because they can be tied into the same control system as your lighting and AV. One button can lower the shades, dim the lights, and start the system. That level of integration is where a theater begins to feel truly custom. For homeowners in bright South Florida environments, this matters even more because daylight is intense and persistent.
6. Put lights on scenes, not just switches
One of the smartest home theater room lighting ideas is simple scene control. Instead of operating each light manually, create presets for the way the room is actually used. You might have a Welcome scene for entering, a Pre-Show scene for settling in, a Movie scene for viewing, and a Clean-Up scene for full brightness afterward.
This is where professional integration pays off. A well-programmed control system removes friction and makes the room easier for everyone to use. No one wants to stand at the wall pressing multiple switches while the previews are already rolling.
7. Keep lighting away from the screen wall
The wall around the screen should remain as dark and visually quiet as possible. Decorative lighting near the display can reduce perceived contrast and pull your eye away from the content. This is particularly important with projectors, where reflected light can noticeably soften the image.
If you want architectural interest on the front wall, use finishes, acoustic treatments, or millwork rather than exposed lighting. The theater should direct attention to the image, not frame it with brightness.
8. Consider bias lighting behind flat panels
In rooms with large direct-view TVs instead of projectors, low-level bias lighting behind the display can improve comfort. It reduces eye fatigue in dark viewing conditions and can make contrast feel more balanced. The light should be soft and neutral, not colorful or flashy.
This is one area where trends can go wrong quickly. RGB lighting effects may look fun in a social media clip, but they rarely support serious movie watching. If the goal is premium performance, restraint wins.
9. Match fixture finishes to the room design
Lighting should support the visual language of the theater. In a contemporary space, trimless fixtures and minimal sconces may fit best. In a more traditional room, richer finishes and architectural details may feel more appropriate. The lesson is not to select lighting in isolation.
A theater succeeds when the audio, video, seating, acoustics, millwork, and lighting feel coordinated. That kind of design discipline is what separates a polished custom installation from a room that feels pieced together over time.
10. Use warm, low-glare light sources
Color temperature and beam spread have a real effect on how comfortable the room feels. Warm lighting generally creates a more inviting environment, especially against darker wall colors and textured finishes. Narrow beams can create sharp hotspots, while poorly shielded lamps can be distracting from certain seats.
It depends on the room layout, ceiling height, and finish materials, but the goal is usually the same: controlled, low-glare illumination that supports the screen rather than fighting it.
11. Design lighting with the whole system in mind
The best theater rooms are not built one trade at a time. Lighting should be coordinated with HVAC vents, speaker locations, projector placement, acoustic panels, and control wiring from the start. If those decisions happen independently, compromises show up later in the form of visible fixtures, awkward switch locations, and performance issues.
That is why lighting design works best as part of a larger integration plan. A company like Sentry Audio Video approaches the room as a complete environment, where every system has to perform reliably and look intentional. For homeowners investing in a premium entertainment space, that level of coordination protects both the experience and the finish quality.
Choosing the right lighting plan for your room
Not every theater needs the same solution. A dedicated, light-controlled cinema can lean heavily into dim perimeter lighting, sconces, and riser lights. A multi-use media room may need more flexible general lighting and stronger daylight management. A projector-based system demands more aggressive ambient light control than a bright flat-panel TV.
That is why the right answer is rarely a single product recommendation. It comes from understanding how the room will be used, what display technology is going in, who will use it most often, and how much control the homeowner wants. The goal is not just beautiful lighting. It is lighting that supports performance every day without requiring constant adjustment.
If you are planning a theater, treat lighting as part of the experience, not the afterthought. The room should feel effortless when guests walk in, and disappear once the movie starts. That is usually the clearest sign the design was done right.